How to Set Speaker Levels in a Home Theater
Automatic calibration does most of this in ten minutes. It also makes three decisions you should check, and one of them is why dialogue sounds quiet in half the systems we hear about.

Disclosure: we earn a commission if you buy through the links on this page, at no extra cost to you. It does not influence what we pick — our criteria are published and reproducible, so you can check our work. How we pick · Full disclosure
These picks are spec-and-price analyses, not listening tests. We have not heard this gear and we do not pretend to have: every figure below is sourced to the manufacturer and linked, and every price is live or not shown at all. Here are the rules we followed.
Quick picks
Ranked on the published criteria in How We Pick. Prices are live as of October 14, 2026. Tap any row for the full write-up.
- 9.0
- 8.2
- 7.6$999.00View on Amazon
$1,300.0023% off
| # | Product | Best for | Score | Price |
|---|---|---|---|---|
| 1 | 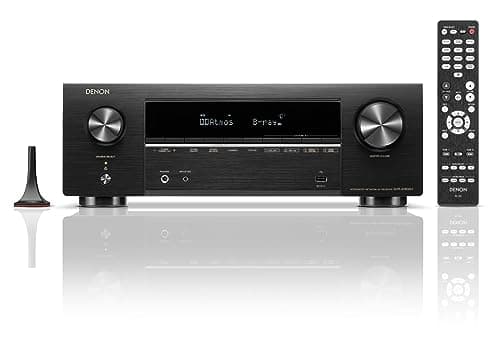 Denon AVR-X1800H Seven channels, 8K passthrough and Audyssey MultEQ XT — the room correction being the feature that actually changes what you hear in a real room. | Best overall under $1,000 | 9.0 | |
| 2 | 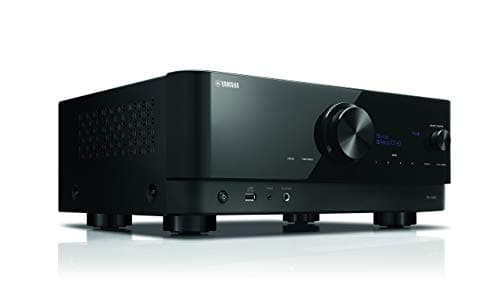 Yamaha RX-V6A The most powerful receiver here on paper — 100 watts a channel rated across the full band — with a phono input and seven HDMI inputs. | Best for music as well as film | 8.2 | |
| 3 | 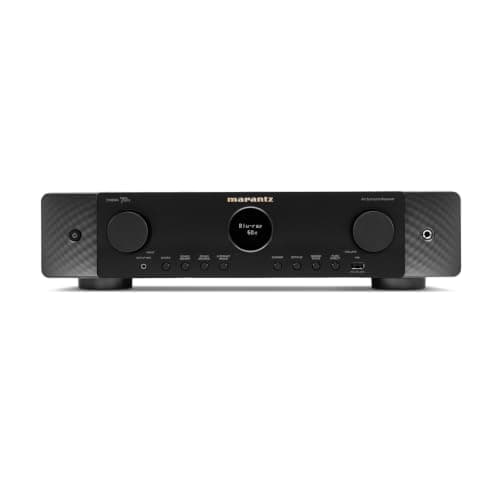 Marantz Cinema 70s A 7.2 receiver in a half-height chassis, which is the entire point — it fits furniture a normal receiver does not. | Slimmest chassis | 7.6 | $999.00View on Amazon $1,300.0023% off |
Levels and distances are the two settings that make five speakers behave like one system. Get them wrong and a correctly placed, correctly chosen set of speakers still produces a soundstage that wanders and dialogue you reach for the remote to fix.
The order of operations
These steps depend on each other, so the sequence is not optional. Every receiver we cover performs them in this order during its automatic setup, and it is the same order to follow if you do it manually.
- Speaker size and crossover. The receiver needs to know which speakers get bass before it can set anything else, because sending 40 Hz to a bookshelf speaker changes the level it measures.
- Distance.The receiver converts each speaker’s distance into a delay so that sound from all channels arrives at the seat together. This has to be right before levels mean anything.
- Level. Each channel is trimmed so all of them produce the same sound pressure at the seat.
- Room correction. Only now does the equalization get applied, on top of a system that is already time-aligned and level-matched.
What the automatic run actually does
The three systems on the receivers we cover are not equivalent, and the differences are published rather than subtle.
- Audyssey MultEQ XT on the Denon AVR-X1800H, with Dynamic EQ and Dynamic Volume. Audyssey MultEQ, a step down, is on the Denon AVR-S670H and the Marantz Cinema 70s.
- YPAO with multipoint measurement on the Yamaha RX-V6A. The RX-V4A gets YPAO without multipoint, which means one microphone position rather than several.
- AccuEQ with AccuReflexon the Onkyo TX-NR6100. Dirac Live is not available on this model — Onkyo starts Dirac at the TX-NR7100.
What each of the three corrects, and what none of them corrects is worth reading before you assume the run has finished the job. The short version: they all set distances and levels well, and they disagree considerably about what to do below 200 Hz.
The three settings to check afterwards
1. The center channel level
This is the one that matters most and the one most often left where the microphone put it. Automatic systems measure with test noise, and dialogue is not test noise: it is a narrower band, it moves, and it is mixed at a level a broadband measurement does not fully represent.
On a Denon, channel trims run from −12.0 dB to +12.0 dB with 0.0 dB as the default, and the setting is unavailable while headphones are plugged into the front panel. If dialogue is consistently hard to follow, a one to two decibel lift on the center is a legitimate adjustment, not a hack — and it is inside the range every receiver here provides.
2. The subwoofer level
Automatic calibration usually sets the subwoofer to match the other channels exactly, which is correct and is also not what most film mixes are made to sound like at home. Cinema calibration allows the LFE channel extra headroom above the other channels, and receivers expose the subwoofer trim separately for this reason.
Change it deliberately, once, and then leave it. Repeatedly nudging the subwoofer trim is usually a symptom of a room mode rather than a level problem, and no amount of trim fixes a null that only exists in one seat.
3. The distances, against a tape measure
Distance errors are the failure mode with the least obvious symptom: nothing sounds wrong, the soundstage is just vague. Automatic systems measure distance acoustically, and a reflective surface near a speaker can push a reading out by a foot or more.
Measure from the seat to each driver with a tape and compare. A discrepancy under about six inches is not worth chasing. Anything larger is worth entering by hand, and every receiver here allows manual distance entry.
Why distance is a level problem too
Distance and level are not independent, and the arithmetic explains why a surround speaker two meters closer than the mains needs a real trim rather than a token one.
ΔSPL = 20 × log₁₀(d₂ ÷ d₁) · free-field inverse-square law
Inputs
- Front left/right distance (typical seated layout): 3.0 m (layout per Dolby's published guide; distance is our example)
- Surround distance in the same room: 1.5 m (layout per Dolby's published guide; distance is our example)
- Denon channel level adjustment range: −12.0 dB to +12.0 dB (default 0.0 dB) (Denon owner's manual, Levels)
Result
20 × log₁₀(3.0 ÷ 1.5) = 20 × log₁₀(2) = 6.0 dB
A surround at half the distance of the mains arrives six decibels louder for the same signal. That is half the receiver’s entire trim range in one direction, spent on geometry alone — and it is why surrounds that seem too loud are almost never a fault in the speaker.
The inverse-square law describes a free field. A real room adds reflected energy, so measured differences are usually smaller than the calculation — often substantially so for the surrounds, which are typically near a wall. Treat this as the upper bound on what geometry can cost you, and let the receiver’s own measurement set the final figure.
What you cannot fix with levels
Level trims are a single number per channel across all frequencies. They cannot fix a response problem that only exists in part of the band, and three common complaints are exactly that:
- Boomy in one seat, thin in another. A room mode. Bass trapping or subwoofer position, not trim.
- Vague imaging across the front. Usually the first reflection, and a mirror finds it in five minutes.
- Dialogue clear on some films, buried on others. A mix difference, and the correct tool is the receiver’s dynamic volume or night-mode processing rather than a permanent center trim.
The short version
Run the automatic calibration properly — microphone at ear height, at the seat, room quiet, and every measurement position it asks for. Then check three things: the center level against real dialogue, the subwoofer trim against a film you know, and the distances against a tape measure. That is twenty minutes, and it is the highest-value twenty minutes in the whole setup.
Every pick in detail
Every specification below links to the manufacturer document we read it from. Where a manufacturer does not publish a figure, we say so rather than estimating it.
Denon AVR-X1800H
Best overall under $1,000Price as of October 14, 2026. #ad
Seven channels, 8K passthrough and Audyssey MultEQ XT — the room correction being the feature that actually changes what you hear in a real room.
- channels
- 9/10
- room correction
- 9/10
- connectivity
- 9/10
- value for money
- 9/10
- future proofing
- 9/10
| Specification | Published value | Source |
|---|---|---|
| Channels | 7.2 (7 power amplifiers — 7.2 or 5.2.2) | Denon info sheet (PDF) |
| Power output | 80 W + 80 W (8 Ω, 20 Hz – 20 kHz, 0.08% THD, 2 ch driven) | Denon info sheet (PDF) |
| Room correction | Audyssey MultEQ XT, with Dynamic EQ and Dynamic Volume | Denon info sheet (PDF) |
| Dolby Atmos / DTS:X | Yes / Yes | Denon info sheet (PDF) |
| Phono input | Yes — MM, 2.5 mV input sensitivity; RIAA deviation ±1 dB (20 Hz – 20 kHz); S/N 74 dB (IHF-A); distortion 0.03% (1 kHz, 3 V) | Denon owner's manual, audio section |
| Analog input sensitivity | 200 mV; frequency response 10 Hz – 100 kHz (+1, −3 dB, Direct mode); S/N 98 dB (IHF-A, Direct mode) | Denon owner's manual, audio section |
| Power consumption | 430 W. Standby 0.1 W — but only with Network Control set to “Off In Standby” and HDMI Pass Through off; CEC standby is 0.5 W. Denon publishes no idle (powered-on, not playing) figure at all. | Denon owner's manual, general section |
| HDMI in / out | 6 in (3 are 8K) / 1 out (eARC) | Denon info sheet (PDF) |
| Video passthrough | 8K/60 Hz, 4K/120 Hz; VRR, QFT, ALLM | Denon product page |
| HDMI 2.1 gaming features | ALLM / QMS / QFT / VRR — Yes / No / Yes / Yes. Denon does not state which of the six inputs carry them beyond the “3 x 8K” count. | Denon product page |
| Pre-outs | 2.2 only (front L/R + 2 subwoofer) — NOT a full 7.2 pre-out | Denon info sheet (PDF) |
| Streaming | HEOS built-in; AirPlay 2, Spotify Connect, Amazon Music HD, TIDAL | Denon info sheet (PDF) |
Pros
- Audyssey MultEQ XT room correction — a step above the plain MultEQ on the cheaper models
- 7.2 channels — enough for a 5.2.2 Atmos layout
- MM phono input, so a turntable connects without a separate stage
- 8K/60 and 4K/120 passthrough with VRR and ALLM
Cons
- Only 2.2 pre-outs (front L/R plus subwoofers) — you cannot add external amplification to the surround channels later
- Menus are dense
- Runs warm in a closed cabinet
Skip it if you only need 5 channels — the AVR-S670H shares the same core for less.
Yamaha RX-V6A
Best for music as well as filmPrice as of October 14, 2026. #ad
The most powerful receiver here on paper — 100 watts a channel rated across the full band — with a phono input and seven HDMI inputs.
- channels
- 9/10
- room correction
- 7/10
- connectivity
- 9/10
- value for money
- 8/10
- future proofing
- 8/10
| Specification | Published value | Source |
|---|---|---|
| Channels | 7.2 | Yamaha spec page |
| Power output | 100 W/ch (8 Ω, 20 Hz – 20 kHz, 0.06% THD, 2 ch driven). Maximum effective output 150 W/ch (1 kHz, 10% THD, 8 Ω) | Yamaha owner's manual |
| Room correction | YPAO with multipoint measurement | Yamaha spec page |
| Dolby Atmos / DTS:X | Yes (with Height Virtualization) / Yes | Yamaha spec page |
| Phono input | Yes — MM, 3.5 mV / 47 kΩ at 1 kHz | Yamaha owner's manual |
| HDMI in / out | 7 in / 1 out (eARC). 8K on inputs 1–3 only | Yamaha spec page |
| HDMI 2.1 gaming features | Not published in the specification table. Yamaha's HDMI feature list for this model reads “8K, 4K Ultra HD (include 8K/60, 50 Hz, 4K/120, 100 Hz 10-bit), 3D Video, ARC, eARC, HDMI Control (CEC), Auto Lip Sync, Deep Color, x.v.Color, HDR10+, Dolby Vision, Hybrid Log-Gamma, DSC FRL, FRL” and HDCP 1.4/2.3 — VRR, ALLM, QMS and QFT are named nowhere in it, and nowhere on the 4K/8K MODE page either. Yamaha adds ALLM and VRR to this model by firmware and documents that separately from the specification. | Yamaha owner's manual, specifications |
| Pre-outs | Front L/R + 2 subwoofer, plus Zone 2 L/R — not a full 7.2 pre-out | Yamaha owner's manual |
| Streaming | MusicCast, AirPlay 2, Bluetooth (SBC/AAC), Spotify Connect | Yamaha spec page |
Pros
- 100 W/ch (8 Ω, 20 Hz – 20 kHz, 0.06% THD) — the highest full-band rating in this group
- Seven HDMI inputs, the most here
- MM phono input, 3.5 mV / 47 kΩ
- YPAO with multipoint measurement, plus MusicCast multiroom
Cons
- YPAO is less sophisticated than Audyssey MultEQ XT on the Denon
- 8K is limited to HDMI inputs 1–3
- Pre-outs are front L/R plus subwoofers only — not a full 7.2
Skip it if room correction quality is your priority — Audyssey MultEQ XT on the Denon goes further.
Marantz Cinema 70s
Slimmest chassisA 7.2 receiver in a half-height chassis, which is the entire point — it fits furniture a normal receiver does not.
- channels
- 9/10
- room correction
- 9/10
- connectivity
- 9/10
- value for money
- 5/10
- future proofing
- 8/10
| Specification | Published value | Source |
|---|---|---|
| Channels | 7.2 (7 powered channels) | Marantz product page |
| Power output | 50 W + 50 W (8 Ω, 20 Hz – 20 kHz, 0.08% THD, 2 ch driven). The slim chassis costs real power against full-size rivals. | Marantz owner's manual |
| Room correction | Audyssey MultEQ with Dynamic EQ and Dynamic Volume | Marantz product page |
| Dolby Atmos / DTS:X | Yes / Yes | Marantz product page |
| Phono input | Yes — MM, 2.5 mV; RIAA deviation ± 1 dB (20 Hz – 20 kHz) | Marantz owner's manual |
| Pre-outs | Full 7.2 — notable at this tier, where the Denon AVR-X1800H offers only 2.2 | Marantz product page |
Pros
- Half-height chassis fits furniture a normal receiver cannot
- Full 7.2 pre-outs — the Denon AVR-X1800H at a similar tier gives you only 2.2, so this is the one here you can actually add amplification to
- 7.2 channels with Audyssey MultEQ and an MM phono input
Cons
- Well over the $1,000 bracket
- 50 W + 50 W into 8 Ω — the slim chassis costs real power against full-size rivals rated at 80–100 W
- You pay a premium for the height, not the performance
Skip it if your cabinet fits a full-size receiver. The slim chassis is most of the surcharge.
Frequently asked questions
What order should I calibrate a home theater in?
Speaker size and crossover first, then distances, then levels, then room correction. The order matters because each step depends on the one before it: a receiver cannot set a correct level for a speaker until it knows whether that speaker is receiving bass, and equalization applied to a system that is not time-aligned corrects the wrong thing.
Should I adjust the center channel level after automatic calibration?
Often, yes. Automatic systems measure with broadband test noise, and dialogue is narrower-band and moves. A one to two decibel lift on the center is a reasonable adjustment if dialogue is consistently hard to follow. Denon’s channel trim range is −12.0 dB to +12.0 dB with 0.0 dB as the default, so this is well inside what the receiver expects.
Why do my surround speakers sound too loud?
Usually distance rather than the speakers. A surround at half the distance of the front speakers arrives about six decibels louder for the same signal, by the inverse-square law. That is what the per-channel level trim exists to correct, and it is why the automatic calibration measures distance before it measures level.
Do I need an SPL meter to set speaker levels?
Not if your receiver has automatic calibration — every receiver we cover ships with a measurement microphone and does this more precisely than a handheld meter and a test tone. A meter is useful for verifying the result afterwards, or for a receiver whose calibration you do not trust. The tape measure is the more useful tool of the two.
Read next
AV Receiver Room Correction, Honestly
What Audyssey, YPAO and AccuEQ tiers actually publish, the one difference that is documented, and the physics room correction cannot beat.
Home Theater Setup: The Complete Guide
The complete setup, built on Dolby's published layout angles rather than on vibes — plus what to do when your room disagrees.
Dolby Atmos Speaker Placement
Dolby's published height angles, ceiling versus up-firing, and what each needs from your room.
The Best Subwoofers for a Home Theater
Six subwoofers ranked on continuous power and published response, including two that publish neither.
Find Your First Reflection Points
The mirror trick, in five minutes and for free — plus why those two points matter more than six panels elsewhere.
The Best AV Receivers Under $1,000
Five receivers under $1,000, compared on FTC-rated power and the pre-out spec almost nobody mentions.
Sources
Every specification on this page was read from one of these documents. If one of them has changed, or we have made an error, tell us — corrections are logged and dated per our editorial policy.
- Denon AVR-X1800H — owner's manual, Levels (trim range and default)
- Denon AVR-X1800H — info sheet (Audyssey MultEQ XT, Dynamic EQ, Dynamic Volume)
- Yamaha RX-V6A — spec page (YPAO with multipoint measurement)
- Onkyo — receiver buying guide (AccuEQ vs Dirac availability)
- Dolby — published speaker setup guides